Soldering copper foil might seem like a daunting task at first glance, but with the right know - how and a bit of practice, you can master this skill. As a copper foil supplier, I've seen firsthand how important it is for people in different industries, from electronics hobbyists to professional circuit board manufacturers, to know how to solder copper foil properly. In this blog, I'll walk you through the process step by step.
Why Choose Copper Foil?
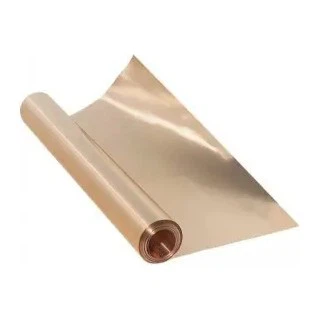
Before we jump into the soldering process, let's talk about why copper foil is such a popular choice. Copper is an excellent conductor of electricity and heat. It's also relatively easy to work with, which makes it ideal for a variety of applications. Whether you're making a custom circuit board, repairing a broken electrical connection, or even working on a DIY art project that requires good conductivity, copper foil is the way to go.
We offer different types of copper foil at our company. For instance, High Tensile Strength Copper Foil is great when you need a foil that can withstand a bit of pulling and stretching without breaking. It's often used in environments where the copper foil might be subject to mechanical stress. On the other hand, Rolled Copper Foil has a smooth surface and excellent flexibility, making it suitable for applications where you need to bend the foil into different shapes. And if you're working on a cooling project, our Radiator Copper Foil is designed to efficiently transfer heat, helping to keep your electronic components cool.
Tools and Materials You'll Need
To start soldering copper foil, you'll need a few essential tools and materials. First off, you'll need a soldering iron. A soldering iron with a temperature control is a great choice as it allows you to adjust the heat according to the specific requirements of your project. You'll also need solder. The most common type of solder used for copper is a lead - free rosin - core solder, which is both environmentally friendly and easy to work with.
Other tools include a pair of wire cutters to trim the copper foil to the desired length, sandpaper or a wire brush to clean the surface of the copper foil before soldering (more on that later), and some helping hands or clamps to hold the copper foil in place while you solder. It's also a good idea to have some flux on hand. Flux helps to clean the surface of the copper and the solder, improving the flow of the solder and making a better connection.
Preparing the Copper Foil
The first step in soldering copper foil is to prepare the foil itself. As I mentioned earlier, cleaning the copper foil is crucial. Over time, copper can develop a thin layer of oxide on its surface, which can prevent the solder from adhering properly. You can use fine - grit sandpaper or a wire brush to gently rub the surface of the copper foil. This will remove the oxide layer and expose the clean copper underneath.
Once you've cleaned the copper foil, you can use a pair of wire cutters to trim it to the appropriate size and shape for your project. Make sure to measure twice and cut once to avoid wasting any of the precious copper foil. If you're working on a circuit board, you might need to use a template to cut the copper foil into the right pattern.
Setting Up the Soldering Iron
Before you start soldering, you need to set up your soldering iron. Plug in the soldering iron and let it heat up. If your soldering iron has a temperature control, set it to the appropriate temperature. For most copper foil soldering projects, a temperature between 350°C and 400°C (662°F and 752°F) is usually sufficient. However, if you're working with thinner copper foil or more heat - sensitive components, you might need to lower the temperature.
While the soldering iron is heating up, you can tin the tip of the iron. Tinning involves applying a small amount of solder to the tip of the soldering iron. This helps to improve the heat transfer from the soldering iron to the copper foil and the solder, making the soldering process more efficient.
Applying Flux
Once the copper foil is prepared and the soldering iron is ready, it's time to apply flux. You can use a flux pen or a small brush to apply the flux to the area of the copper foil where you'll be soldering. The flux will help to clean the surface of the copper and the solder, and it will also prevent the formation of new oxide layers during the soldering process.

Soldering the Copper Foil
Now comes the actual soldering part. Hold the soldering iron with one hand and the solder with the other. Place the tip of the soldering iron on the area of the copper foil where you've applied the flux. After a few seconds, when the copper foil is hot enough, touch the solder to the joint between the soldering iron and the copper foil. The solder should melt and flow onto the copper foil, forming a smooth and shiny joint.
Move the soldering iron and the solder along the length of the copper foil, applying the solder evenly. Make sure to keep the soldering iron in contact with the copper foil for long enough to ensure that the solder adheres well, but not too long that you damage the copper foil or any nearby components.
Checking the Solder Joint
After you've finished soldering, it's important to check the solder joint. The joint should be smooth, shiny, and free of any cracks or air bubbles. You can use a magnifying glass to inspect the joint more closely. If the joint doesn't look good, you can re - heat the joint with the soldering iron and add more solder if necessary.
Cooling and Finishing
Once you're satisfied with the solder joint, let it cool down naturally. Do not blow on the joint or try to cool it artificially, as this can cause the solder to solidify unevenly and create a weak joint. After the joint has cooled down, you can use a clean cloth to wipe away any excess flux.
Tips and Tricks
Here are a few additional tips to help you become a better copper foil solderer. First, practice makes perfect. If you're new to soldering, start with some simple projects and gradually work your way up to more complex ones. Second, always work in a well - ventilated area, as soldering can produce fumes that are harmful if inhaled. Third, keep your soldering iron tip clean. You can use a damp sponge or a brass wire sponge to clean the tip of the soldering iron between soldering jobs.
Contact for Purchase and Collaboration
If you're in the market for high - quality copper foil for your soldering projects or any other applications, we'd love to hear from you. Our team of experts is ready to assist you in choosing the right type of copper foil for your specific needs. Whether you need a small quantity for a DIY project or a large order for a commercial operation, we've got you covered. Don't hesitate to reach out for a quote or to discuss your requirements. We're committed to providing excellent customer service and top - notch products.
References
- "Soldering Handbook" by Electrovert
- "The Art of Electronics" by Paul Horowitz and Winfield Hill